ICARUS-Weblicht-Perspective
The  perspective provides an easy way to use CLARIN-D Webservices (WebLicht Tübingen):
Index:
Webchain Toolbar:

 = Save all
  webchains (ICARUS\data\webchain.xml)
  = Execute the selected
  webchain
  = Add New Webchain
  = Delete the selected
  webchain
  = Clone the selected
  webchain
  = Open dialog to rename the selected
  webchain
  = Edit the selected
  webchain
  = Show
  webservice details. Note: read-only mode, to edit the webservice use the
  edit webservice button that can be found within the
  webservice view tab
WebserviceToolbar:

 =Save Webservice
  = Add Webservice
  = Delete Webservice
  = Clone Webservice
  = Edit Webservice
  = Sort webservices in ascending order
  = Sort webservices in descending order
How to create a new webservice:
Creating a new webservice require the following steps:
Switch to the
 tab (on the left)
 Click
 to create a new webservice. Then the new webservice window will show up.
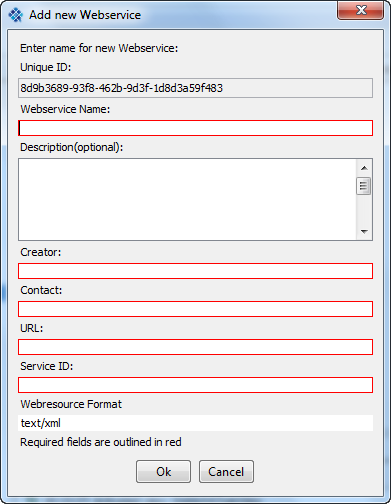
- Fill in all the required information and press "ok". Note: The input and output features will be added in step 5.
This will add the webservice to the webservice list to the left. Select the webservice and click
 to edit the io-features.
 The io-features are all attribute-name/attribute-value pairs. E.g. lang: de (name = lang; value = de), type: text/plain (name=type; value = text/plain) if there is no value only the name must be specified.
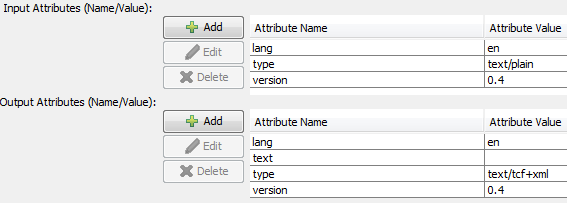
- Apply all changes - now the webservice may be used within webchains.
Example webservice information (screenshot taken from WebLicht Tübingen) 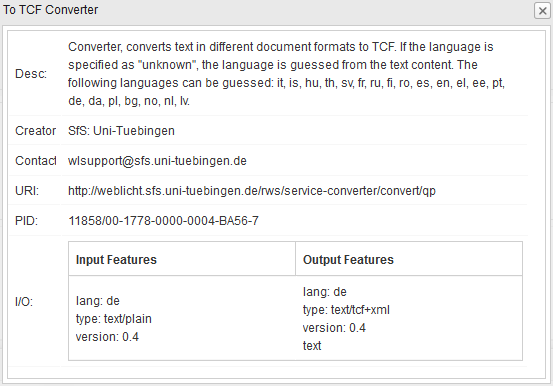
and the resulting ICARUS webservice 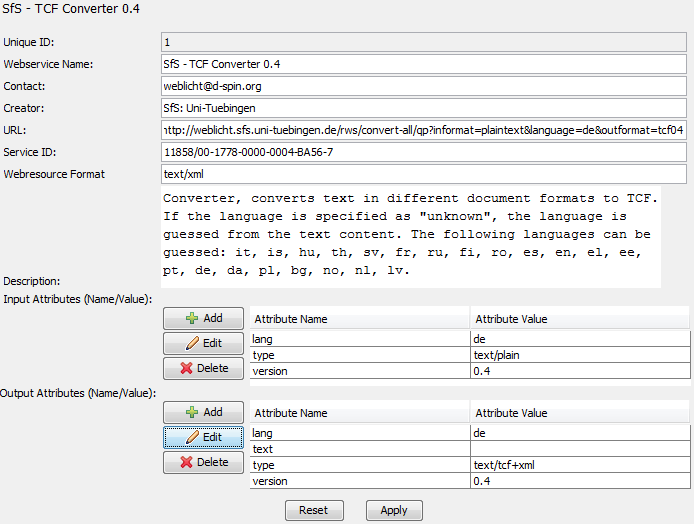
How to create a new webchain:
Before creating a new webchain  all necessary
  webservices
  must have been speficied.
Switch to the
 tab (on the left)
 Click
 to create a new webchain. Then the "new webchain dialog" will show up
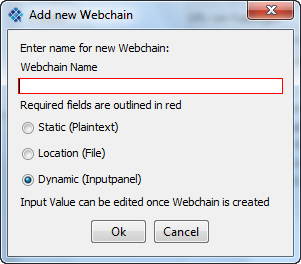
- Static Input = The user can specify a string that is always used as an input when executing the webchain.
- Location = A file is used as input (user must ensure by hisself that the input is a valid / readable file for the io-webervice).
- Dynamic = Whenever the webchain is executed a dialog shows up where the user may specify a string that will be passed to the webchain.
Add all desired webservices to the chain. Example:
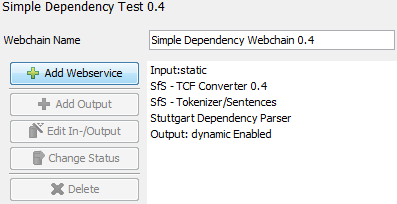
- For each webchain one output must be specified. The webchain output can be saved to a file or diplayed within ICARUS (dynamic) (if there is a presenter that can handle the output data)
The webchain is executed using
 the button.
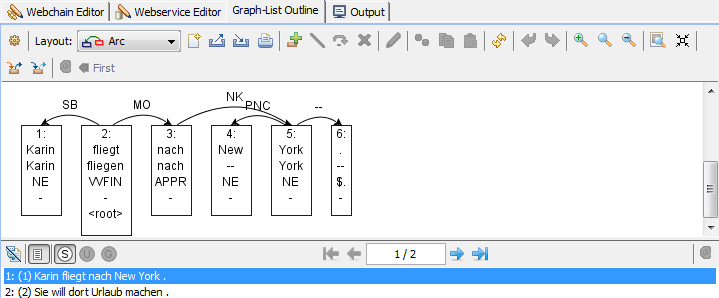
Example: The Webchain shown in 4.) was executed, using "Karin fliegt nach New York. Sie will dort Urlaub machen." as a static input. The output was set to dynamic and therefore the result was passed to the graph outline tab. The resulting parse of the two sentences is shown below:
Any webservices and chains the user created (and saved) can be found in the icarus folder under the following destination: icarus\data\weblicht.xml (webservices) and icarus\data\webchain.xml (Webchains).
