|
Size: 6773
Comment:
|
Size: 7287
Comment:
|
| Deletions are marked like this. | Additions are marked like this. |
| Line 1: | Line 1: |
| ==== ICARUS-Matetools-Parser-perspective ==== | = ICARUS-Matetools-Parser-perspective = |
| Line 4: | Line 4: |
| ===== How to parse a text/sentence: ===== | [[ICARUS|Back To ICARUS Main Page]] <<Anchor(icarus-mt-index)>> == Index: == I. [[#how-to-parse|How to parse a text/sentence]] I. [[#mt-graph-list-outline|Graph-List Outline]] I. [[#table-outline|Table Outline]] I. [[#parser-input|Parser Input]] <<Anchor(how-to-parse)>> == How to parse a text/sentence: == |
| Line 17: | Line 28: |
| Line 19: | Line 29: |
| Line 22: | Line 31: |
| ==== Graph-List Outline ==== | [[#icarus-mt-index|Back To Index]] <<Anchor(mt-graph-list-outline)>> == Graph-List Outline == |
| Line 26: | Line 39: |
| Graph-List Outline Toolbar: {{attachment:matetools_graph-outline-tb.png}} | '''Graph-List Outline Toolbar:''' {{attachment:matetools_graph-outline-tb.png}} |
| Line 69: | Line 82: |
| Line 72: | Line 84: |
| Toolbar: {{attachment:text-tb.png}} | '''Toolbar:''' {{attachment:text-tb.png}} |
| Line 83: | Line 95: |
| [[#icarus-mt-index|Back To Index]] | |
| Line 86: | Line 99: |
==== Table Outline ==== |
<<Anchor(table-outline)>> == Table Outline == |
| Line 91: | Line 103: |
| ==== Parser Input ==== | [[#icarus-mt-index|Back To Index]] <<Anchor(parser-input)>> == Parser Input == |
| Line 94: | Line 109: |
| Toolbar: {{attachment:matetools_parserinput-tb.png}} | '''Toolbar:''' {{attachment:matetools_parserinput-tb.png}} |
| Line 103: | Line 118: |
[[#icarus-mt-index|Back To Index]] |
ICARUS-Matetools-Parser-perspective
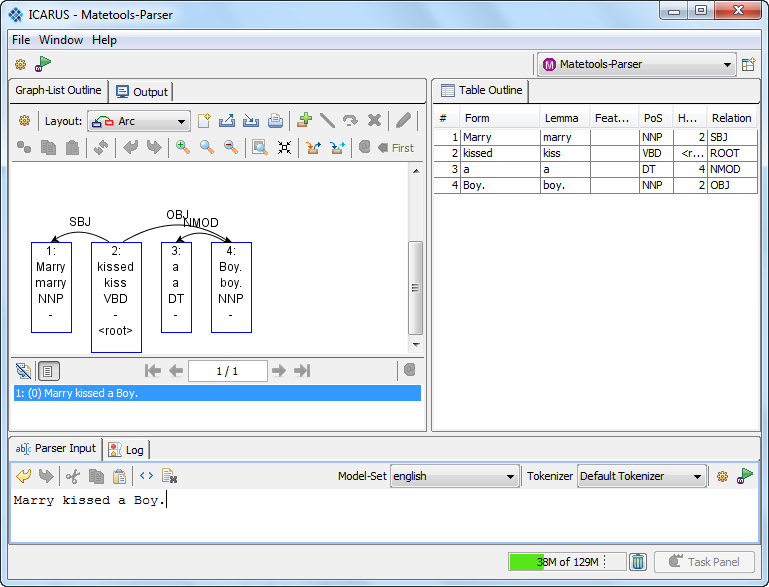
The  perspective provides a GUI to use the mate-tools parsing pipeline.
Index:
How to parse a text/sentence:
- Copy the prefered text/sentence into the "Parser Input Field".
- Select the desired model set
- If the parsing model is already specified continue with 3.)
To create a new parsing model click on
 This will open the matetools preferences dialog
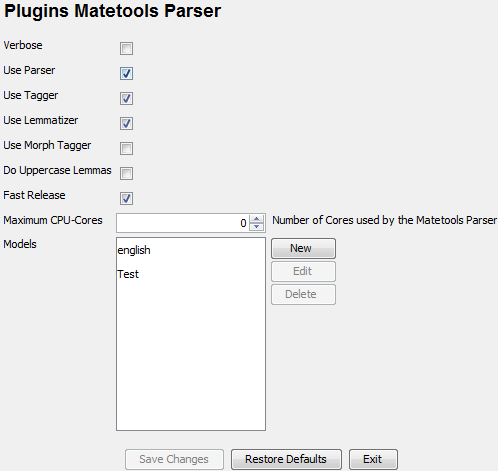
Click "New" to create a new model, edit or delete to manage existing models. Example model (edit mode):
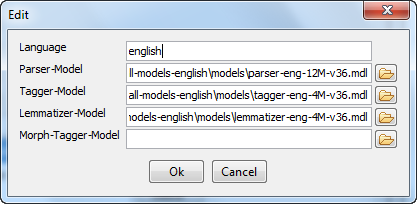
- Note: In this example we have no moprh-tagger model set. This works because the "Use Morph Tagger" Option above is unchecked.
- Specify the parser-, tagger-, lemmatizer- and morph-tagger-model
- After setting up the model it can be used by clicking on the model set dropdown menu.
- Select the tokenizer. The default tokenizer use whitespace to split the sentence into tokens.
Click on
 to parse the text/sentence.
Graph-List Outline
 This tab is used to show the parse tree:
Graph-List Outline Toolbar: 
 = Open the preferences
  = Change the current graph layout. There are three different layout types available
Arc layout

No layout

Tree
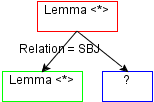
 = Clear graph panel - every nodes/edges are deleted
  = Save the current search graph to XML file (may be imported later)
  = Import a search graph XML file
  = Print the current graph
  = Add a new node to the current search graph
  = Connects two nodes (two nodes must be selected before this action can be performed)
  = Connects two nodes with a precedence relation (two nodes must be selected before this action can be performed)
  = Delete selected node/edge (multi selection possible)
  = Open the edit node/edge dialog (Instead of using this button you may doubleclick a node/edge to open the edit dialog)
  = Duplicate (copy and insert) the selected nodes/edges. Quick way to duplicate a graph. Note: edges are only copied when their source and target node is selected.
  = Copy and the selected nodes/edges. Note: edges are only copied when their source and target node is selected. (strg+c)
  = Paste previously copied nodes/edges. (strg+p)
  = Redraw the graph, can be useful while adding new nodes, edges or constraints may mess up the graph layout. Example (arc-layout): (left nodes/edges unsorted; right nodes/edges reorderes)
 = Undo the last graph editor operation
  = Redo the last graph editor operation
  = Increase zoom level
  = Switch back to the default zoom level
  = Decrease zoom level
  = Autofit zoom level to the current graph panel size (default off)
  = Compress graph (right-left). Merge node/edge information into a node. Search annotation highlight is never merged and always visible. (default off)
  = Highlight the incoming edge of the selected node (multiselection possible) (default off)
  = Highlight the outgoing edge/edges of the selected node (multiselection possible) (default off)
 Example where the node "son" is selected and highlight is switched on for incoming and outgoing edges
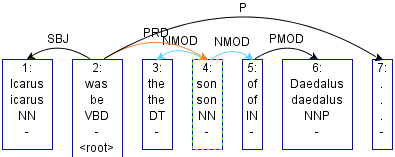 Note: It is possible to navigate through a graph (after selecting at least one node/edge) using the "arrow keys"
 = unused right now
At the lower part of the graph panel is the text outline. A list that contains all sentences that have been parsed in the current matetools session. The selected sentence is shown in the graph panel.
Toolbar: 
 = Toggle a textpanel to copy the selected sentence. (see below)
  = First sentence
  = Previous sentence
  = Shows the current selected sentence (first number) and the total sentences (last number). In the example figure sentence 2 of 3 is selected. The user may navigate using the arrows to the left/right. It is possible to enter the sentence no. in this field by pressing "return" the sentence pops up. Note that the sentence numbers belong to the the internal index (the corpus index may differ for example if one sentence number have been skipped)
  = Next sentence
  = Last sentence
Table Outline
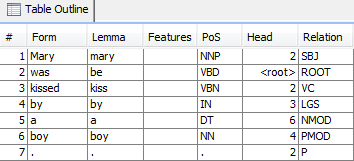 A table representation of the graph shown in the Graph-List outline.
Parser Input

Toolbar: 
 = Undo the last operation
  = Redo the last operation
  = Cut the selected text
  = Copy and the selected text. (strg+c)
  = Paste previously copied text. (strg+p)
  = Select all text within the parser input panel
  = Clear parser input panel
